
Making homemade, hand decorated paper is super fun. But beyond a fun family adventure, the process of artistic creation helps children develop large and small motor skills as they manipulate the materials and tools, practice decision-making as they judge what natural materials to use and where to place them on the paper for a pleasing effect, collaborate with others to gather and process the materials and express themselves through their creations.
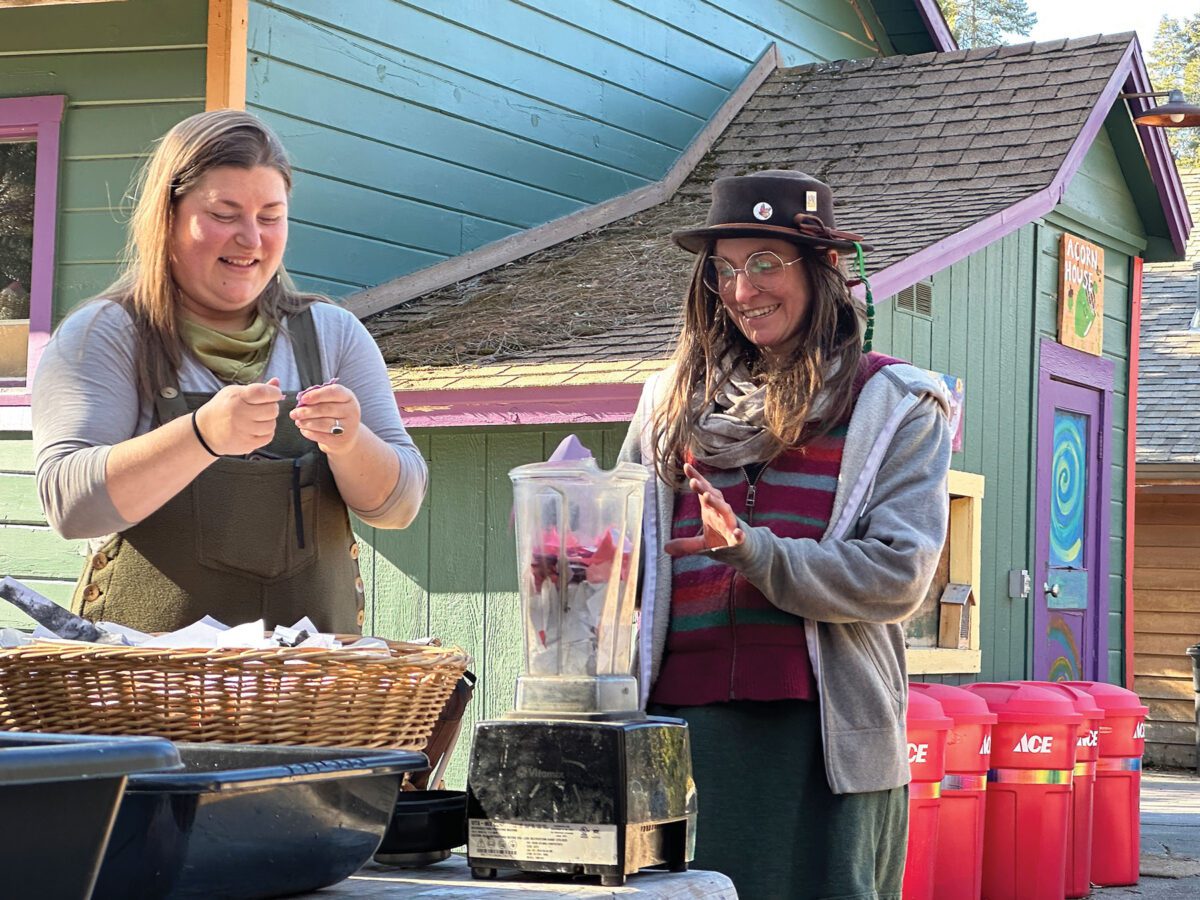
Making and decorating homemade paper is easy and requires just a few tools and materials. Ilanna Greenfield’s Regenerative Arts Learning Center and Day Camp students and instructors show us how.
Tools
- Blender (A heavy-duty blender is best, but any blender will do if not overloaded with paper and water)
- Tub for paper scraps
- Tub for paper slurry
- Deckles or framed screens (Inexpensive ones are available at craft stores or you can make your own by stretching fine plastic or metal screening tightly over wooden frames or even upcycling wooden photo frames and old window screens or using cooking screens.)
- Dishtowels and absorbent hand towels to lay paper on to dry
- Cellulose hand sponges
- Bucket for water to add to the paper to make the slurry
- Bowls for squeezing out the sponges
Materials
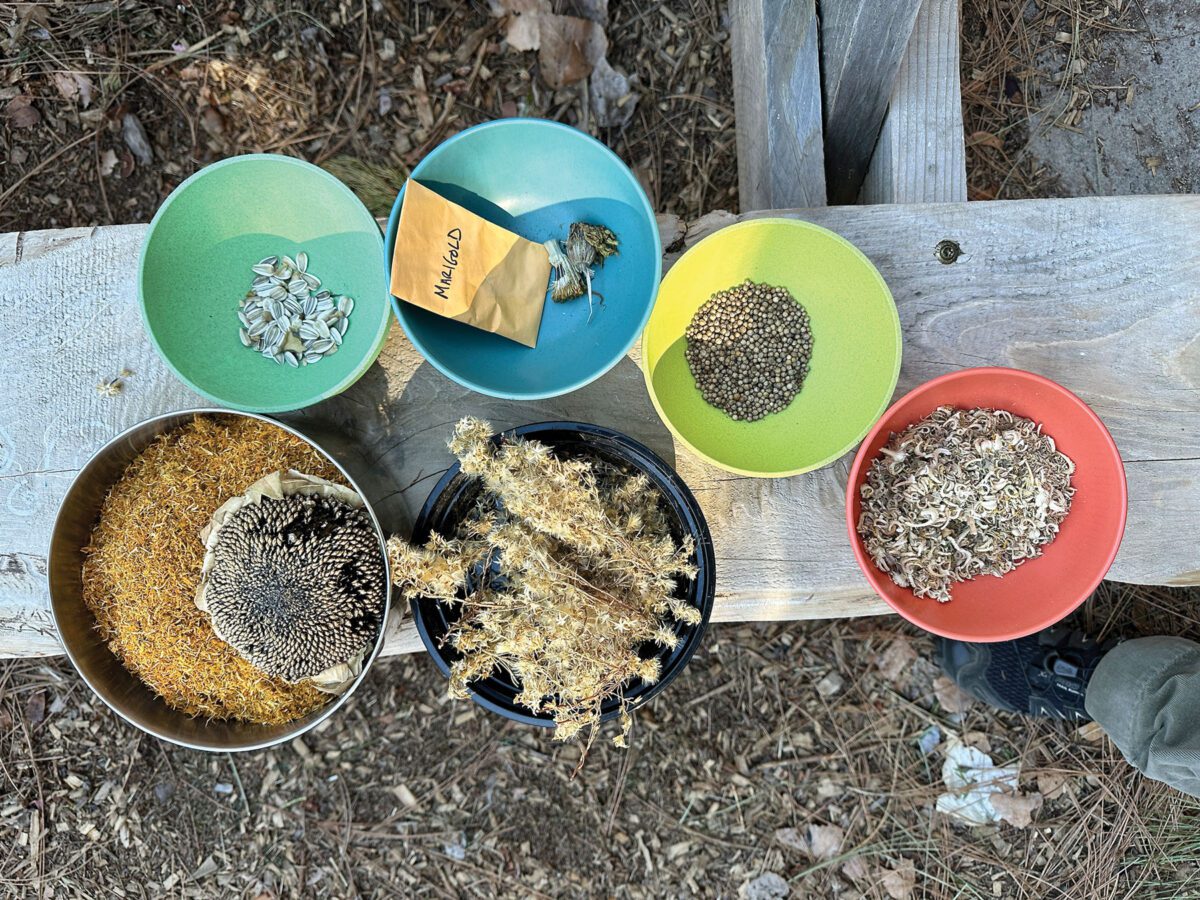
Scrap paper. (Colored paper, scrap printer paper, paper with drawings or writing. Just about any kind of scrap paper will do. Organizing your crap paper into colors is helpful if you’d like a specific hue. Adding sprinkles of other colored paper into the last moments of blending can add specks of fun contrasting color.) Dried natural materials to decorate the homemade paper sheets like: Dried flower petals, Fluffy weed tops, Pine needles, Seeds (small and/or flat are best).
Process
- Gather all the materials and tools before beginning.
- Place the tub of paper scraps next to the plugged-in blender.
- Lay the dish towels out over the absorbent hand towels on a flat table with the tub for the slurry and the sponges nearby.
- Roughly tear all the paper into small 2”- 3” pieces.
- Fill the blender three quarters full with torn paper pieces.
- Add water to the blender so paper and water only fill the blender three quarters full. (Water will fill between paper and weigh paper down)
- Turn blender on and pulse until paper is a mushy slurry.
- Add seeds or flower petals or contrasting color paper and pulse the blender for just a few seconds.
- Pour the slurry into the slurry tub and repeat paper and water blending process until the tub is full enough with slurry to dip the frames in and scoop up the slurry onto the frames.
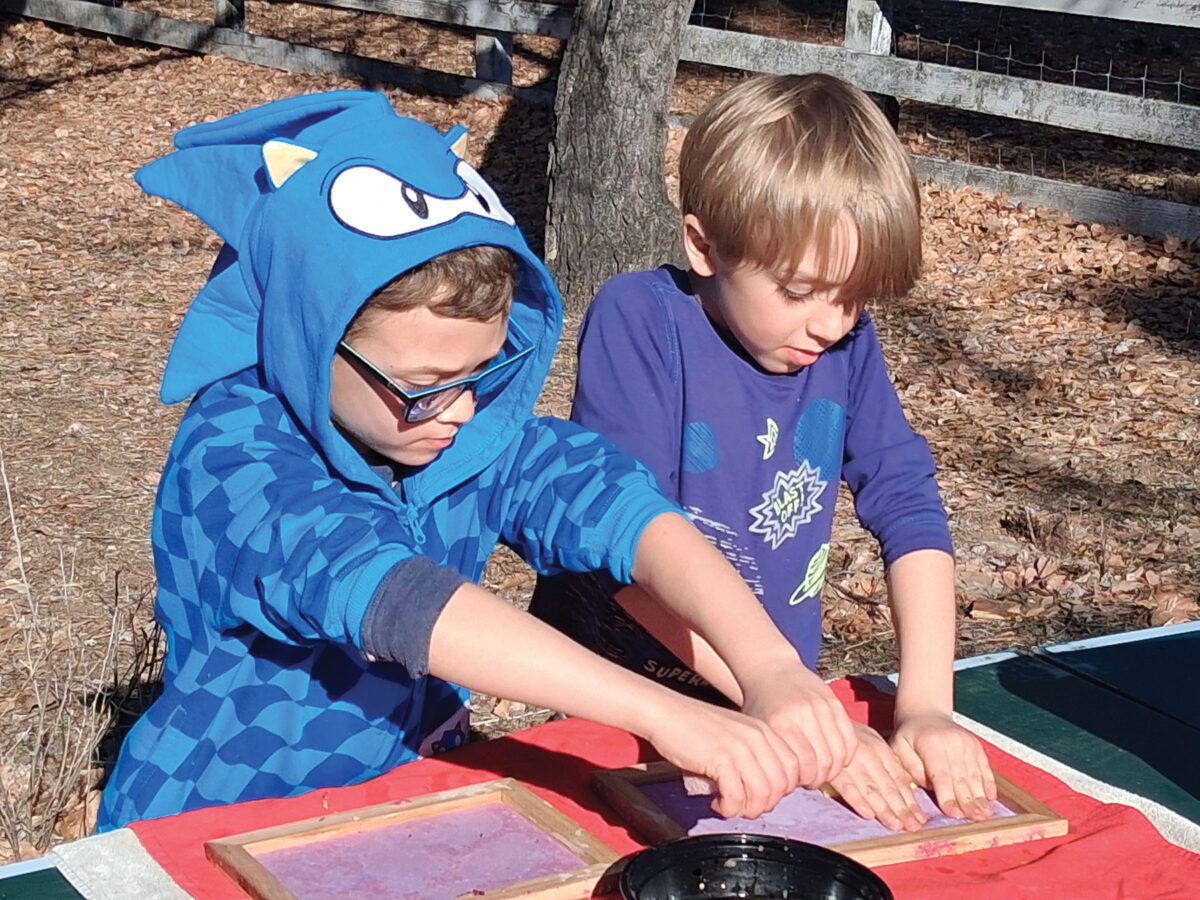
- When placing the frames into the slurry, dip them so the slurry is on the side of the frame on which the screen is stretched, not the side on which the frame rises above the screen.
- Gently shake the slurry around a bit and let drain to make an even coverage.
- Decorate the paper slurry on the screen with the natural materials you have gathered.
- Turn the frame quickly upside down on the dish towels.
- Press the sponge onto the screen to absorb the water from the paper slurry, squeezing out the sponge as you go. Repeat, making sure you sponge all over the paper and around all the edges, until water no longer comes out of the sponge when you squeeze it
- Remove the frame and allow the paper to dry. Turn it over to see the final gorgeous design you have created on handmade paper!

Posted in: Art & Music

Comment Policy: All viewpoints are welcome, but comments should remain relevant. Personal attacks, profanity, and aggressive behavior are not allowed. No spam, advertising, or promoting of products/services. Please, only use your real name and limit the amount of links submitted in your comment.
You Might Also Like...

Coloring Outside The Lines – How to Encourage Your Child’s Creativity
Two-year-old Kristy makes a train across Mommy and Daddy’s bed by lining up Daddy’s socks heel to toe. Natalie, 21 months, adorns her arm with cookie cutters, points and says, […]

Seussical Jr. Comes to Town!
The timeless stories of Dr. Seuss come to life on Friday, September 18, in Seussical Jr., a kids’ musical that’s great fun for the whole family. Watch as Horton the […]

Who’s Behind the Magic? A deeper look at three North State holiday productions
The North State offers numerous holiday productions, as evidenced in our Going Places events calendar. We took the time to find out about the creative force behind three of them: […]

Fostering Creativity – Five North State businesses that can become your family’s “home away from home”
December is a great month to focus on creativity, because it’s happening all the time, whether decorating a home, wrapping a package, baking treats, planning a menu, or even creatively […]

